It turned out that E liked the spaghetti sauce.

 He wasn’t such a big fan of the scrubbing his face needed afterward, though.
family, woodworking, photography, K-pop
He wasn’t such a big fan of the scrubbing his face needed afterward, though.My mom’s a great cook. Growing up we ate a lot of Korean food but she also cooked some American standbys like sloppy-joes and spaghetti. I knew I’m biased, but I’ve always really liked her spaghetti sauce. I have no idea how authentic it is as Italian food goes, but it’s chunky and substantial and full of vegetable and meaty goodness.
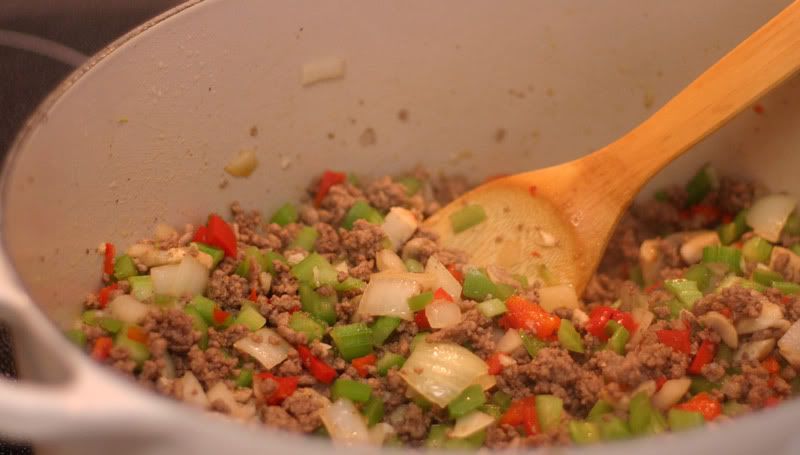 The vegetables and meat before the tomatoes are added.
So basically what I’m saying is that you should halve this recipe unless you have to feed an army (or want to have enough frozen sauce to fill half your freezer).
Recipe: Faith’s Mom’s Spaghetti Sauce
Ingredients
Directions
![]()
This game is all the rage at our house right now. In Broken Picture Telephone, users alternate drawing pictures and writing descriptions of them. And you only have ten minutes.
I can’t draw to save my life, but I like looking at the stories and watching as they develop. N can draw quite decently and has been having a lot of fun playing the game. You can see his pictures here.
Oh, and happy St. Patrick’s day!
***Edited to add*** It seems like the game’s servers have been having trouble today. Try the site later if you’ve have trouble.
I made some nice progress at woodworking last week. The lids were taken out of the clamps and turned out okay. There were a few small gaps where the mitered edges had slipped a bit in the clamps but I don’t think they’re that noticeable.
 The three lids, waiting to be sanded.
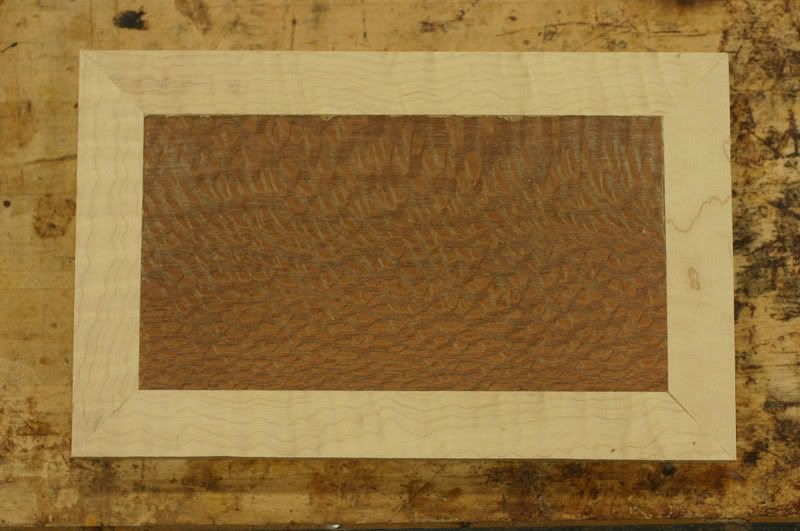 A close-up of the lacewood and curly maple lid.
 Next I cut stock to size for the sliding trays inside the jewelry boxes. I used the table saw to cut dadoes for the tray dividers and rabbits on the sides.
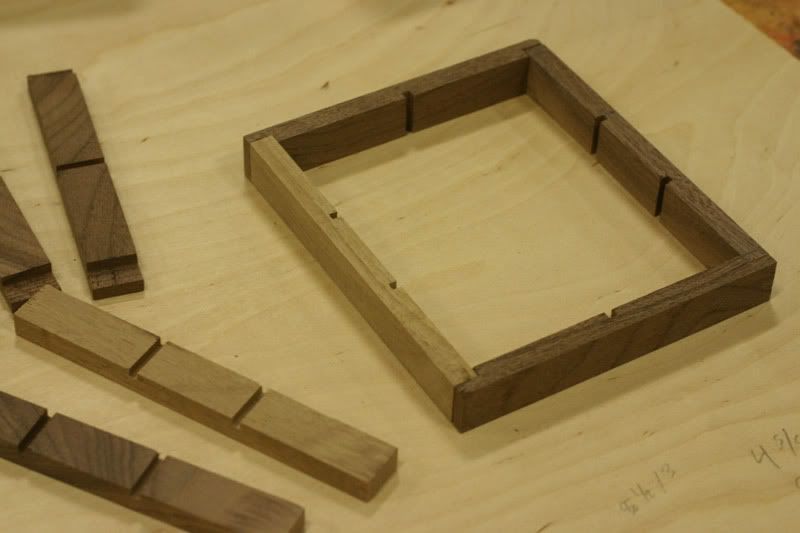
This Wednesday I’ll cut wood down to size to make tray dividers, glue the trays together, and sand the lids down.
Just three more classes left! (Yikes!)
Last week I bought this smoothing creme from Pantene’s NatureFusion line. I’ve used it 3 or 4 times so far and like it. It makes my hair sleeker, it’s not sticky, and it smells good. And it doesn’t cost an arm and a leg (always good).
As a teenager and while in college I flirted with learning taekwondo but never got serious about it. But I enjoy martial arts movies and over the weekend we watched a great one we got from Netflix.
Chocolate is a Thai action movie directed Prachya Pinkaew. Pinkaew also directed Ong-bak and Tom yum goong, both of which I’ve seen and like.
The plot in Chocolate is kind of hokey (autistic girl learns martial arts from Bruce Lee movies and collects mob money to pay for her mother’s medicine) but the movie succeeds because of its star, Jeeja Yanin.
Chocolate rests squarely on Yanin’s tiny shoulders. She trained for the movie for two years and it shows. Her skills are really impressive and the fight choreography makes the most of them. While we were watching the movie I kept gasping in amazement during the fight scenes. It’s really fun to watch this tiny little girl kick butt. I’m looking forward to seeing what she does next.
Whew! So far today I have caught up a bit on work, had a good workout at the gym, and put E down a nap. Now the house is blissfully quiet. The rest of the schedule for today includes 1) showering 2) going to Costco and the grocery store 3) cleaning up the house (a friend I haven’t seen since college is coming over for dinner tomorrow night and lastly 4) making sure that all of my woodworking supplies (and plans!) are ready for class tonight.
I’m not a huge chocoholic but this last week had been very chocolate-centric. When N and I went grabbed a bit to eat at Caputo’s Deli during the Sundance Film Festival I noticed that offer cooking and tasting classes. On Monday night my sister Jan and I went to their Focused Tasting: Intro to Fine Chocolates class. I know it’s pretty lame, but I’m a total sucker for snobby foodie type things. I love the idea of being expert at something. If I wasn’t LDS I would probably be a super annoying tea/coffee/wine snob. But since those are off the table, hello chocolate!
The class was very educational. The teacher is the son of the store’s owner and a few years back he set out on a quest to educate himself about the world of fine chocolate so he could be a more informed buyer for the store. He’s a self-proclaimed chocolate snob and while at times the snobbery was a tiny bit off-putting he definitely knew what he was talking about.
It was fun to learn the “proper” way of tasting chocolate (which is apparently not scarfing down Christmas Hershey’s kisses after finding them in the pantry in March. Ahem.) This is the tasting protocol that professionals use. (Chocolate should be at room temperature.)
So we smelled and tasted 6 or 7 fine chocolates and discussed the different flavorings of each. They were all dark chocolates but there were huge differences in flavors. The flavor really depends on what type of chocolate bean was used and where the bean was grown.
He said that there are a lot of myths about dark chocolate (which almost all fine chocolates are). Two of them in particular are that 1) more cacao is always better (65-75% is the preferred range) and 2) the more bitter the chocolate the better it is (It’s not. Bitterness often comes from over roasting).
 One of the chocolates we tasted was Amano Madagascar (voted #1 by those who supposedly know about these things). I was tempted to spit it out. It was SO tart and vinegary–bleh! I wanted to like it because the experts say it’s awesome AND it’s made by a company here in Utah but it was definitely not to my taste.
Another chocolate, Domori Javablond, is supposed to be simply awesome and is noted for it’s wildly different flavors like bleu cheese and petrol (yes, petrol). I didn’t like it. It smelled like a Sharpie marker.
 But the finest chocolate in the world is apparently universally agreed to be Amedei Chuao. I liked it pretty well but at $12 a bar it’s definitely not something you keep around the house for making s’mores. My favorite out of the chocolates we tasted was actually the Pralus Djakarta (smokey and kind of woodsy).
Overall, I would recommend the class. I had never tasted such interesting and pure flavors in chocolate before. It was a real eye-opener. It was convenient to be able to sample small pieces of several different fine chocolates; I would never plunk down the $65+ it would have cost to buy one bar of each of the chocolates. And the chance to hang out with Jan without the kiddos was a much-appreciated bonus.
I still enjoy learning about food but I think I also learned a little lesson about how while being into food is fun, being an extreme food expert/snob can be kind of off-putting to others. (And knowing is half the battle!) So I shall endeavor to keep my snobbery in check.

My cell phone miraculously started working again over the weekend! This means that happily (and sadly) I don’t need to go buy a new cell phone. (Sigh. And I just when I was eying the Samsung Omnia. Does anyone have it and love it/hate it?)
I guess I’ll just have to stick to my original plan and wait to get a new phone until I hit my first weight-loss target. Just 6 lbs. to go!
Class this week was kind of a comedy of errors. I carpool to class with my friend Kristin and this week when she picked me up I handed her a soda for the ride and tucked one into my purse for myself. As we’re driving down the street I feel something wet and realize that my soda is leaking. We have to pull over so I can pour an inch of soda out of my bag. My cellphone, wallet, and camera all got wet; the wallet and camera are okay but the cellphone is kaput. Out of the three things the phone was the most expendable since it was a cheap Go phone I got at Target but I’m worried that my sim card is ruined and I’ll have lost all of my contacts. *Grrr.*
Anyway, when we got to class I promptly realize that I left my plans at home! This, on top of the Great Soda Debacle of Aught Nine, was almost too much and I wasted a good 10 minutes fuming and pacing about in frustration. Then I calmed down and got to work on the box lids which I didn’t need my plans for anyway.
 Instead of doing a true panel for the lid I am gluing the trim onto the middle panel and then sanding it smooth. I’m using African lacewood for the middle and some gorgeous curly maple for the sides of the lid.
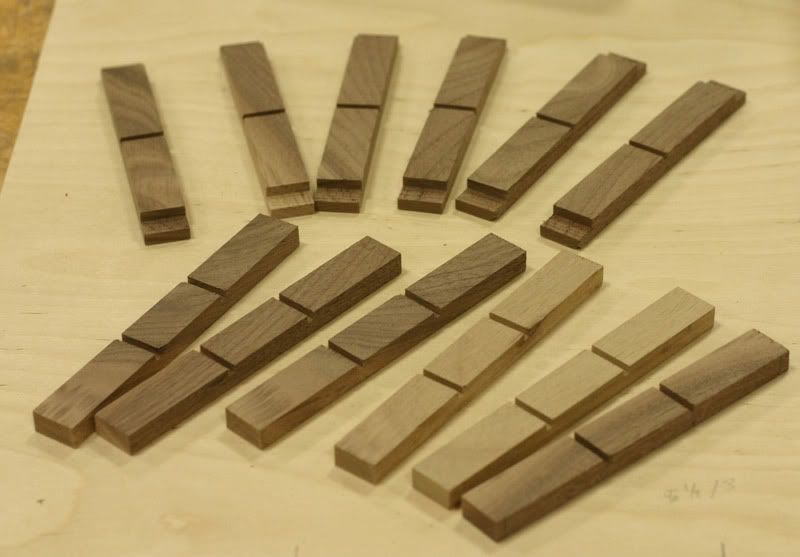
After cutting the middle panel to size I cut the maple pieces on a chop saw set at a 45 degree angle. It was painstaking work. I took multiple passes at cutting the pieces because they need to be exactly the right size and I didn’t want to cut them too short. Sometimes it would take me 6 or 7 passes to get it right. But it paid off; I only cut one piece too short.
Then I glued the lids together.
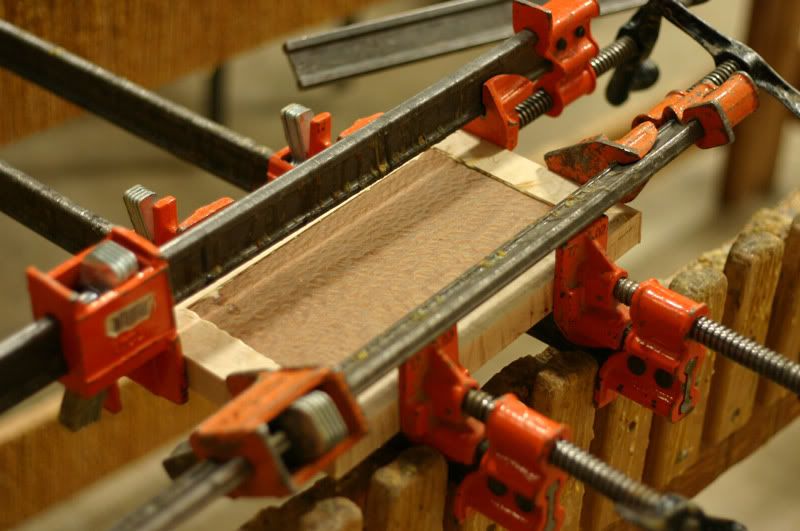 A lid in clamps being glued.
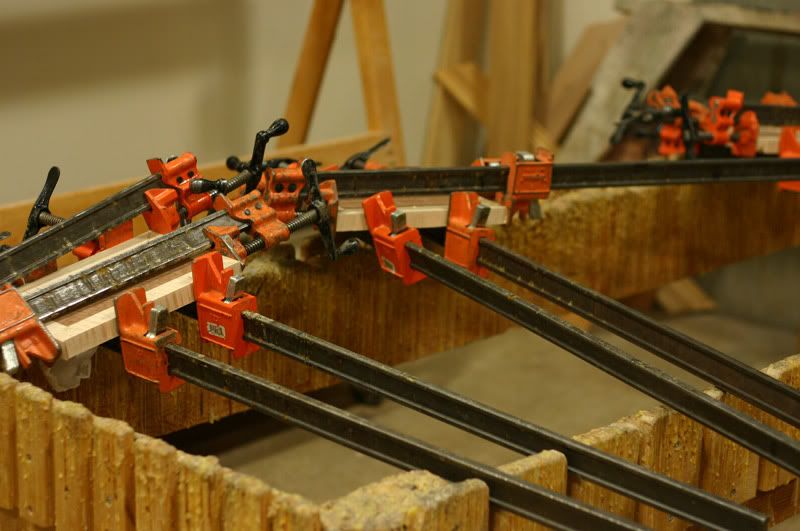 Three sets of gluey lid goodness.
My instructor was super nice and let me glue up even though there wasn’t enough time left during class. (We’re only supposed to glue up if there’s enough time in class to take our projects out of the clamps before class is over.) I was pretty desperate to get the lids glued this week so I can sand them next week. He said he would take care of the lids and put them in my locker the next morning. (Being one of only two girls in the class really pays off sometimes!)
There’s only four more classes left but I still think I’ll be able to finish on time (fingers crossed). I think it will mostly depend on what I can get done next week. One thing’s for sure: I’m going to be certain to bring my plans!